
An electrical panel amperage upgrade is the process of replacing your home’s main service panel with one rated for higher current capacity, typically moving from 100 amps to 200 amps or beyond. This upgrade is the single most effective way to give your home the electrical headroom it needs for modern appliances, Level 2 EV chargers, heat pumps, and solar battery systems. If your breakers trip regularly, your lights flicker when the dryer runs, or you’re planning any major addition to your home’s electrical load, this upgrade electrical panel amperage guide walks you through every step. The industry standard term for this work is a “service upgrade” or “service entrance upgrade,” and understanding that distinction matters before you call a licensed electrician.
How to determine if you need to increase your panel amperage
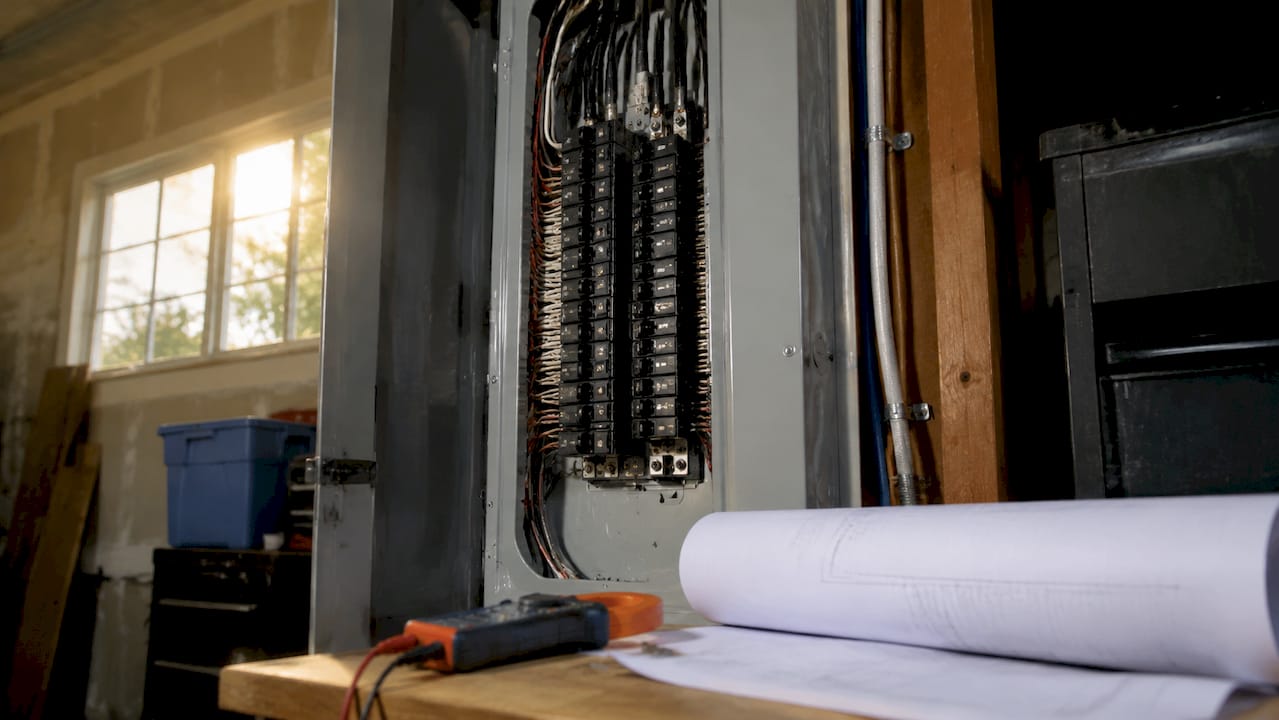
The clearest signal that your panel is undersized is a breaker that trips without an obvious overload. Frequent breaker trips, flickering lights, and burning smells are the three most common warning signs that your current service cannot handle your household’s demand. Each of those symptoms points to circuits running at or above their rated capacity on a regular basis.
Start by locating your main breaker, usually a large double-pole breaker at the top of your panel. The number stamped on it, commonly 100, 150, or 200, is your current amperage rating. If that number is 100 or below and you are adding any of the following loads, an upgrade is almost certainly necessary.
Signs you need a service upgrade:
- Breakers trip when you run multiple appliances at once
- Lights dim when the HVAC system or refrigerator cycles on
- You smell burning plastic near outlets or the panel itself
- You want to add a Level 2 EV charger, which draws 32 to 40 amps continuously and can consume nearly half of a 100-amp panel on its own
- You are installing a heat pump, induction range, or whole-home battery backup
The National Electrical Code recommends keeping continuous loads below 80% of a circuit’s rated capacity. That means a 100-amp panel should carry no more than 80 amps of continuous load. Add a Level 2 charger, a heat pump, and an electric water heater, and you will exceed that threshold quickly.
Pro Tip: Before calling an electrician, write down every large appliance in your home and its amperage draw. Your electrician will perform a formal load calculation, but having that list ready speeds up the assessment and helps you plan for future additions at the same time.
A 200-amp panel provides 30 to 42 breaker slots, which matters as much as raw amperage. If your current panel is physically full, you cannot add new circuits regardless of how much capacity remains on the main breaker. Physical space and amperage capacity are two separate constraints, and both must be evaluated.
What you need before starting the upgrade
Upgrading your circuit breaker panel is not a weekend DIY project. It requires a permit, a licensed electrician in most jurisdictions, and coordination with your utility company before a single wire is touched.
| Requirement | Details |
|---|---|
| Electrical permit | Required in virtually every U.S. jurisdiction; pulled by your electrician before work begins |
| Utility disconnect | Your utility must de-energize the service entrance before the meter base is touched |
| New main panel | A 200-amp panel with 30-42 slots; hardware cost typically runs $300 to $800 |
| Meter base | May need replacement to support higher amperage service |
| Service entrance cable | Must be rated for the new amperage; undersized wire is the most common oversight |
| Inspection | A licensed inspector signs off before utility reconnection |
The total cost for a standard 100-to-200-amp upgrade, including the panel, meter base, permits, and utility coordination, typically runs $2,000 to $5,000. More complex projects involving service entrance replacement or utility transformer upgrades can reach $10,000 or more. Budget for the higher end if your home is older or if the service entrance cable has not been replaced in decades.
One detail that surprises many homeowners: a 200-amp panel with 100-amp service entrance wire still limits your capacity to 100 amps. The panel rating and the service capacity are not the same thing. Your electrician must evaluate the entire path from the utility transformer to your main breaker, not just the panel box itself.
Pro Tip: Submit your utility application and permit application at the same time. Utility scheduling is the most common bottleneck in panel upgrades, and utility coordination can add 3 to 6 weeks to your project timeline if you wait until after the permit is approved.
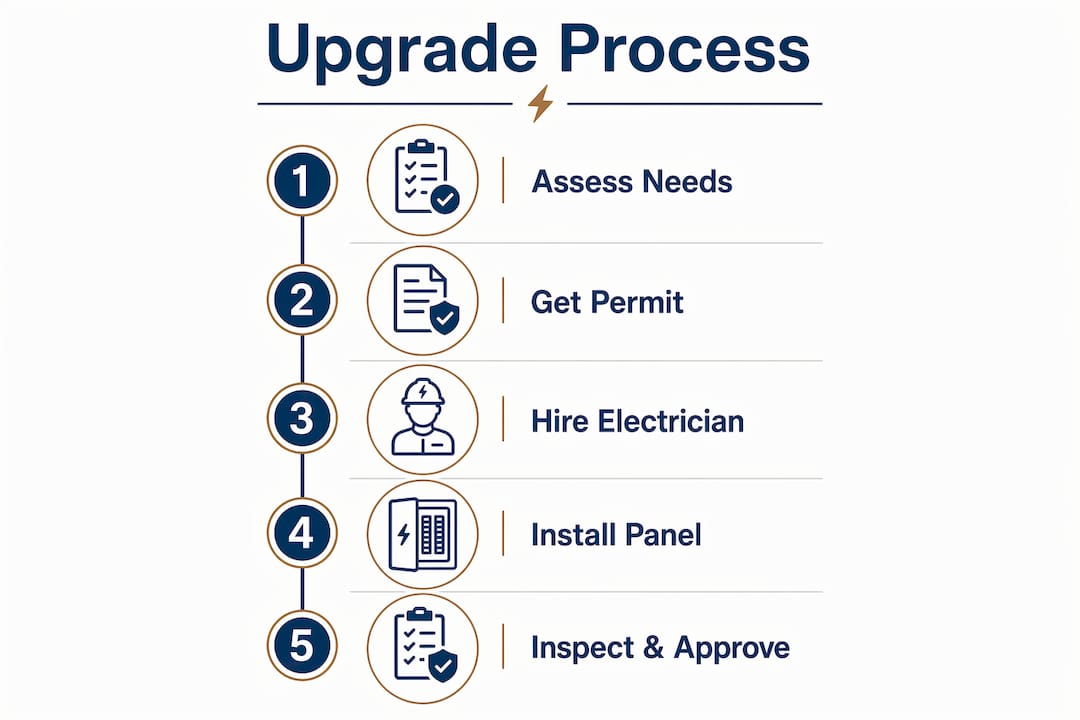
Step-by-step process for upgrading your electrical panel
These electrical panel upgrade steps reflect the standard workflow a licensed electrician follows. You will not be doing this work yourself, but understanding each phase helps you ask the right questions, set realistic expectations, and avoid being caught off guard by scope changes.
-
Obtain permits and schedule the utility disconnect. Your electrician pulls the permit from your local building department. Simultaneously, you or your electrician contacts the utility to schedule a service disconnect. Do not skip this step or attempt to work on the meter base without utility authorization.
-
Remove the old panel and meter base. Once the utility has de-energized the service entrance, the electrician removes the existing meter base and panel. Every circuit wire is labeled before removal so reconnection is accurate. This is also the point where the service entrance cable is inspected and replaced if it is undersized for the new amperage.
-
Install the new meter base and service entrance cable. The new meter base must be rated to match the upgraded amperage. The service entrance cable, the wires running from the utility connection point to your meter and panel, must also be rated for 200 amps. Installing a 200-amp panel without upgrading these components is one of the most common and costly mistakes in panel upgrades.
-
Mount and wire the new electrical panel. The new panel is secured to the wall, grounded, and bonded according to NEC requirements. The main breaker is installed, and the neutral and ground buses are connected. Your electrician will also verify that the panel is positioned for safe clearance, at least 36 inches of clear working space in front of the panel per NEC 110.26.
-
Reconnect existing circuits and add new ones. Each circuit wire is reconnected to an appropriately sized breaker. This is also the time to add any new circuits you planned, such as a dedicated 50-amp circuit for an EV charger installation or a 240-volt circuit for a heat pump. Tandem breakers can be used in slots that allow them, but your electrician will confirm which slots are rated for them.
-
Schedule inspection and utility reconnection. The building inspector visits to verify the installation meets local code. After the inspection passes, the utility reconnects service and installs the new meter. The electrician then performs a final check of every circuit under load before signing off.
Comparing 100-amp vs. 200-amp service:
| Feature | 100-amp panel | 200-amp panel |
|---|---|---|
| Breaker slots | 12 to 20 | 30 to 42 |
| Suitable for EV charger | Rarely | Yes |
| Heat pump compatible | Marginal | Yes |
| Solar/battery ready | No | Yes |
| Typical upgrade cost | Baseline | $2,000 to $5,000 |
Common pitfalls when upgrading panel amperage
Most delays and cost overruns in panel upgrades come from a short list of predictable mistakes. Knowing them in advance puts you in a much stronger position.
- Confusing panel rating with service capacity. A new 200-amp panel does nothing if the service entrance wire is still rated for 100 amps. Always confirm the full path from the utility to the panel is upgraded together.
- Ignoring breaker slot count. Physical space in the panel is as important as amperage. If you need 10 new circuits and the new panel only has 8 open slots, you will need a sub-panel or a larger main panel.
- Underestimating total project cost. Homeowners who budget only for the panel box are often surprised by the added cost of the meter base, service entrance cable, and utility fees. Get an itemized quote that covers every component.
- Delaying the utility application. Utility scheduling adds 3 to 6 weeks in many areas. Starting that process on day one of planning, not day one of construction, keeps your project on schedule.
- Hiring an unlicensed contractor. Panel work that fails inspection must be redone at your expense. Always verify your electrician holds a current state license and carries liability insurance.
“The homeowners who have the smoothest upgrades are the ones who treat the utility application like the first item on the checklist, not the last.” This is the single most consistent pattern seen across panel upgrade projects in the Grand Strand area.
For a deeper look at warning signs specific to Myrtle Beach homes, older construction and coastal humidity create additional risk factors worth reviewing before you schedule your upgrade.
Key takeaways
A successful electrical panel amperage upgrade requires evaluating both panel rating and service entrance capacity, coordinating with your utility early, and planning for 3 to 5 years of future electrical demand in a single project.
| Point | Details |
|---|---|
| Check the full service path | Panel rating and service entrance capacity must both match your target amperage. |
| Start utility coordination first | Utility scheduling adds 3 to 6 weeks; apply before the permit is even approved. |
| Budget for the complete project | Total costs run $2,000 to $5,000 and include meter base, cable, permits, and labor. |
| Plan for future loads | Add circuits for EV chargers, heat pumps, and solar at the same time to avoid repeat upgrades. |
| Hire a licensed electrician | Unpermitted or failed work must be redone at your cost; verify credentials before signing. |
What 40 years of panel upgrades taught me about planning ahead
The homeowners who call me frustrated are almost never the ones who planned too much. They are the ones who called after the EV charger installer told them their panel was too small, or after they signed a solar contract and discovered the utility needed six weeks to schedule a disconnect. By that point, they are paying for delays they could have avoided entirely.
The advice I give every homeowner is this: treat your panel upgrade as a platform, not a fix. Planning for 3 to 5 years of electrical growth during a single upgrade costs almost nothing extra in labor but saves you from a second major project two years from now. If you are adding an EV charger today, rough in the conduit for a second one. If solar is on your five-year list, tell your electrician now so the panel is positioned correctly.
The other thing most guides skip is the emotional side of utility coordination. Homeowners expect the electrician to control the timeline. The electrician controls the installation. The utility controls when your power comes back on. Those are two different schedules, and conflating them is where most project frustration originates. Ask your electrician on day one: “When are you submitting the utility application?” If the answer is “after we start,” push back.
For Grand Strand homeowners specifically, coastal salt air accelerates corrosion on service entrance components. A panel that looks fine from the outside can have corroded lugs that reduce effective capacity well below the rated amperage. That is one more reason to have a licensed electrician inspect the full service path, not just the panel box, before you finalize your upgrade scope.
— SEO
Ready to upgrade? Greg Beverly Services can help
Greg Beverly Services has handled residential panel upgrades across the Grand Strand for over 40 years, from straightforward 100-to-200-amp upgrades to full service entrance replacements in older coastal homes. The team manages permit applications, utility coordination, and inspections so you are not chasing paperwork while your project sits idle. Whether you are adding an EV charger, preparing for solar, or simply replacing a panel that has been tripping breakers for years, Gregbeverlyservices provides itemized quotes with no surprises and workmanship backed by decades of local experience. Scheduling is straightforward, and the team serves homeowners throughout Myrtle Beach, North Myrtle Beach, and Surfside Beach. Contact Gregbeverlyservices to get your upgrade scoped and scheduled before the next delay finds you.
FAQ
How much does a 100-to-200-amp panel upgrade cost?
A standard upgrade from 100 to 200 amps costs $2,000 to $5,000, covering the panel, meter base, service entrance cable, permits, and labor. Complex projects involving utility transformer upgrades can exceed $10,000.
Can I upgrade my electrical panel myself?
Panel upgrades require a licensed electrician and a permit in virtually every U.S. jurisdiction. The work involves the service entrance, which remains energized until the utility disconnects it, making unlicensed attempts both illegal and dangerous.
How long does an electrical panel upgrade take?
The physical installation typically takes one to two days, but utility scheduling adds 3 to 6 weeks to the overall timeline. Submit your utility application at the same time as your permit to avoid delays.
Will a 200-amp panel support a Level 2 EV charger?
Yes. A Level 2 EV charger requires a dedicated 40-to-50-amp circuit, and a 200-amp panel provides the capacity and breaker slots to support it alongside your existing loads. A 100-amp panel rarely has the headroom to do so safely.
What is the difference between panel amperage and service capacity?
Panel amperage is the rating of the breaker box itself. Service capacity is determined by the service entrance wire and utility transformer feeding your home. A 200-amp panel paired with 100-amp service wire still limits your home to 100 amps of actual capacity.