
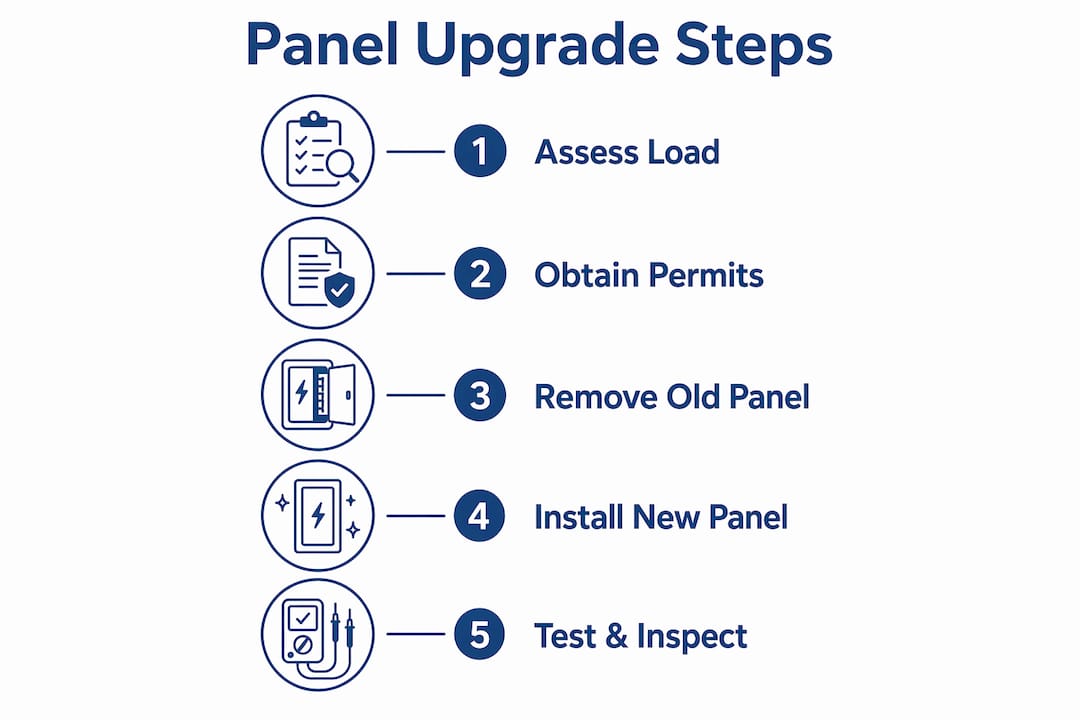
Electrical panel modernization is the process of replacing an outdated breaker box with a new, code-compliant unit sized for your home’s current and future electrical loads. Following the correct modernize old electrical panel steps protects your family from fire hazards, prevents costly code violations, and creates capacity for EV chargers, solar systems, and backup generators. The process runs from load assessment and permit procurement through installation, grounding, and final inspection by the Authority Having Jurisdiction (AHJ). A licensed electrician, proper tools, and NEC 2026 compliance are non-negotiable at every stage.
What preparatory steps are essential before modernizing an old electrical panel?
Preparation determines whether your panel upgrade goes smoothly or stalls at the permit office. Before any wires are touched, a licensed electrician must conduct a professional load assessment per NEC Article 220, accounting for voltage-ampere ratings per square foot, small appliance circuits, and the largest motor load at 125%. Skipping this step causes undersizing in a significant share of projects, and an undersized panel creates the exact hazard you are trying to eliminate.
Identifying hazardous panels before you start
Not all old panels are equal in their risk level. Panels flagged as hazardous, including Federal Pacific Stab-Lok, Zinsco, and Challenger brands, have documented failure rates and must be replaced rather than repaired. If your home still runs on one of these, the upgrade is urgent, not optional.
Permits and utility coordination come next. Your local building department issues the electrical permit, and your utility company schedules the service disconnect. Notify the utility early because scheduling windows can run one to two weeks out, and a delayed disconnect stalls the entire project.
Preparation checklist before work begins:
- Completed load calculation by a licensed electrician
- Electrical permit pulled from the local building department
- Utility disconnect scheduled with your power company
- New panel, main breaker, meter base, and service entrance cable on site
- Personal protective equipment: insulated gloves, safety glasses, voltage tester, and lockout/tagout hardware
Pro Tip: Contact your utility company at least two weeks before your planned installation date. Utility scheduling is the most common source of project delays, and early notification keeps your timeline intact.
What are the step-by-step procedures to safely remove an old electrical panel?
Safe removal begins the moment the utility cuts power at the meter. Never assume the panel is de-energized based on a tripped main breaker alone. The service entrance cables entering the top of the panel remain live until the utility physically disconnects at the transformer or installs a meter pull. Verify zero voltage on every conductor with a calibrated voltage tester before touching anything inside the enclosure.
The removal sequence follows this order:
- Confirm utility disconnect. Call your utility to verify the service is pulled, then test all conductors with a non-contact voltage tester.
- Apply lockout/tagout. Lock the meter socket and tag the panel with your name and contact information to prevent accidental re-energization.
- Label every circuit. Before disconnecting a single wire, label each circuit conductor at the panel with its breaker position, destination, and load description.
- Disconnect breakers. Remove branch circuit wires from breakers one at a time, coiling and labeling each as you go.
- Remove the main breaker and bus bars. Disconnect the service entrance cables from the main lugs last, after all branch circuits are clear.
- Extract the panel enclosure. Unscrew the mounting hardware and carefully remove the box from the wall, keeping all conductors organized.
- Dispose of the old panel properly. Older panels may contain PCBs or heavy metals. Check with your local waste authority for approved disposal methods before placing anything in a standard dumpster.
Pro Tip: Physically trace each circuit with a circuit identifier tool before labeling. Visual labeling alone produces errors that cause hours of troubleshooting after the new panel is energized.
How to install and wire the new electrical panel according to 2026 safety standards?
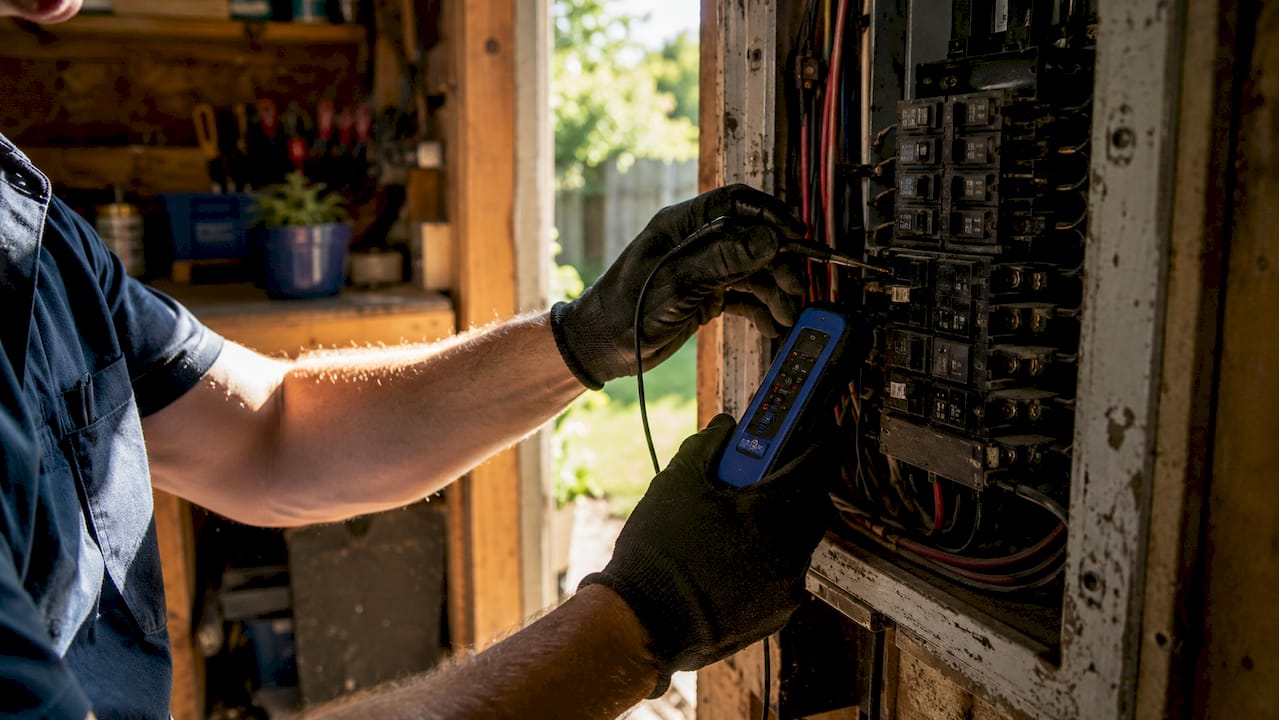
Installation starts with the enclosure, not the wires. Mount the new panel on a solid wall surface and verify that the workspace meets NEC 110.26 clearance requirements: 30 inches wide, 36 inches deep, and 78 inches high in front of the panel. If the existing location is in a closet, bathroom, or stairwell, the panel must be relocated before installation proceeds. Relocation adds cost and scope, but it is required by code and non-negotiable.
Installation steps in sequence:
- Mount the new enclosure and verify plumb and level alignment
- Install the updated main breaker and meter base if the service entrance is being upgraded
- Connect the grounding electrode system to ground rods, water pipes, or both, and test continuity
- Pull each labeled branch circuit conductor into the panel and connect to the correct breaker position
- Torque every lug and terminal to the manufacturer’s specification printed inside the panel door
- Install AFCI/GFCI breakers in all locations required by the 2026 NEC, including bedrooms, kitchens, bathrooms, and garages
- Add a whole-home surge protection device at the main panel
The torque requirement is one detail many DIY attempts miss. Under-torqued connections arc and overheat. Over-torqued connections crack the lug and create the same problem. Use a calibrated torque screwdriver and follow the values stamped on the panel’s label.
Circuit labeling per NEC 408.4
The 2026 NEC requires circuit labels to be legible, specific, and durable. “Bedroom” is not acceptable. “Master bedroom outlets, north wall” meets the standard. Clear labeling protects the next electrician who opens the panel and helps you identify circuits quickly during an emergency.
| Installation task | Key standard |
|---|---|
| Panel workspace clearance | NEC 110.26: 30" wide, 36" deep, 78" high |
| AFCI protection | Required in bedrooms, living areas, and hallways per 2026 NEC |
| GFCI protection | Required in kitchens, bathrooms, garages, and outdoors |
| Conductor torque | Per manufacturer label inside panel door |
| Circuit labeling | NEC 408.4: specific, legible, and durable |
Pro Tip: Bundle and route wires along the sides and bottom of the panel interior rather than across the center. This keeps the panel cooler, makes future maintenance faster, and impresses the AHJ inspector.
What testing, inspection, and verification steps confirm a safe panel upgrade?
Testing is not optional and not a formality. Homeowners should expect their electrician to trip and reset every breaker, simulate loads on each circuit, and verify that no breaker trips under normal operating conditions. This process catches wiring errors, loose connections, and mislabeled circuits before the AHJ inspector arrives.
The verification sequence runs as follows:
- Re-energize the panel. Have the utility restore service and confirm the main breaker closes without tripping.
- Test each breaker. Trip and reset every breaker individually to confirm mechanical function.
- Simulate circuit loads. Plug in load testers or actual appliances to verify stable operation under realistic demand.
- Test AFCI and GFCI devices. Press the test button on every AFCI and GFCI breaker and confirm it trips and resets correctly.
- Schedule the AHJ inspection. AHJ inspectors verify torque, labeling, grounding, and breaker function before issuing a certificate of occupancy or final approval.
- Complete the homeowner walkthrough. Walk through every circuit with the homeowner, explain the labeling system, and document the completed work.
“Permits and inspections provide critical oversight. Transparency from electricians regarding load calculations and NEC compliance is essential for long-term reliability.” — Electrical Panel Upgrade: 6 Steps To Modern Safety
Document everything. Photographs of the completed installation, the permit card, and the inspection approval form belong in your home’s permanent records. This documentation protects you at resale and proves code compliance to your insurance carrier.
How do modern panel upgrades support future electrical demands?
A modern panel upgrade is the electrical equivalent of replacing a home’s water main. It sets the capacity ceiling for everything you add afterward. Upgrading from a 100-amp service to 200 amps or 400 amps is now standard practice because EV chargers, heat pumps, and induction ranges each draw loads that older panels were never designed to handle.
Future-proofing benefits of a modern panel:
- EV charging capacity. A Level 2 EV charger requires a dedicated 240-volt, 50-amp circuit. A 100-amp panel often cannot accommodate this alongside existing loads.
- Solar and battery storage. Solar inverters and battery backup systems require dedicated breaker space and proper interconnection, both of which a modern panel provides.
- Backup generator integration. A transfer switch or interlock kit connects a standby generator to the panel safely, preventing backfeed onto utility lines.
- Smart breaker compatibility. Newer panels from manufacturers like Leviton and Square D accept smart breakers that monitor individual circuit energy use in real time.
- Surge protection. A whole-home surge protection device installed at the panel protects every outlet and appliance from voltage spikes caused by lightning or utility switching.
The 2026 NEC also introduced updated requirements for outdoor disconnects on one-family and two-family dwellings. If your home does not have a readily accessible means of disconnecting power from outside, your panel upgrade may need to include an exterior disconnect switch. This is a code compliance item, not an upgrade option.
| Upgrade feature | Benefit |
|---|---|
| 200A or 400A service | Supports EV chargers, heat pumps, and solar simultaneously |
| AFCI/GFCI breakers | Reduces electrical fire and shock risk in living areas |
| Whole-home surge protector | Protects appliances from voltage spikes |
| Smart breakers | Enables real-time circuit-level energy monitoring |
| Outdoor disconnect | Meets 2026 NEC requirements for one-family dwellings |
Key takeaways
Modernizing an old electrical panel requires load assessment, permit procurement, safe removal, code-compliant installation with AFCI/GFCI breakers, and AHJ-verified inspection before the system is considered complete.
| Point | Details |
|---|---|
| Start with load assessment | A licensed electrician must calculate your home’s total load before sizing the new panel. |
| Identify hazardous panels early | Federal Pacific, Zinsco, and Challenger panels require immediate replacement, not repair. |
| Meet NEC 110.26 clearances | The panel workspace must be 30" wide, 36" deep, and 78" high or the panel must be relocated. |
| Install AFCI/GFCI protection | The 2026 NEC mandates these breakers in bedrooms, kitchens, bathrooms, and garages. |
| Complete AHJ inspection | Final inspection confirms torque, labeling, grounding, and breaker function before approval. |
Why the steps matter more than the hardware
After years of watching panel upgrades go right and wrong, the pattern is clear. Homeowners who focus on finding the cheapest panel or the fastest electrician almost always end up with a second visit, a failed inspection, or a safety issue that surfaces months later. The hardware is the easy part. The steps are where the project succeeds or fails.
The most common mistake I see is skipping the load calculation or treating it as a formality. A proper load calculation takes 30 to 60 minutes and determines whether a 200-amp service is sufficient or whether you need 400 amps to support your planned additions. Getting this wrong means you are back at the permit office within five years.
The second mistake is underestimating the inspection process. Some homeowners view the AHJ inspection as a bureaucratic hurdle. It is actually your best protection. An inspector who finds a torque error or a missing AFCI breaker before the wall is closed saves you from a fire hazard that would otherwise go undetected for years. Embrace the inspection. It is the final quality check that no amount of DIY confidence can replace.
Future-proofing is the third area where I see homeowners leave value on the table. If you are already pulling permits and opening walls, adding two or four spare breaker spaces costs almost nothing at installation time. Adding them later, after the panel is closed and the walls are finished, costs significantly more. Think about your EV charger needs and solar plans now, not after the project is complete.
— SEO
Ready to upgrade your panel the right way?
Greg Beverly Services brings over 40 years of electrical expertise to homeowners across the Grand Strand area. Whether you need a full panel upgrade service or want to plan for EV chargers, backup generators, and solar integration, the team at Gregbeverlyservices handles every step from load calculation through final AHJ inspection.

Gregbeverlyservices pairs transparent communication with code-compliant workmanship so you know exactly what is being installed and why. Explore residential electrical services or call to schedule a consultation. Your home’s electrical system should work as hard as you do, and Gregbeverlyservices makes sure it does.
FAQ
What does it cost to upgrade an electrical panel?
A standard panel upgrade from 100 amps to 200 amps costs $1,500 to $4,000, with full service upgrades exceeding $10,000 when meter base and service entrance cable replacement are included.
How long does a panel replacement take?
Most residential panel replacements take one full day for a licensed electrician, assuming permits are in hand and the utility disconnect is already scheduled.
Do I need a permit to replace my electrical panel?
Yes. An electrical permit is required in every U.S. jurisdiction for panel replacement. The permit triggers an AHJ inspection that verifies the work meets current NEC standards before the system is approved.
Which old panels are considered dangerous?
Federal Pacific Stab-Lok, Zinsco, and Challenger panels are flagged as hazardous due to documented breaker failure rates. If your home has one of these, replacement is the only safe course of action.
Can I add an EV charger without upgrading my panel?
Only if your current panel has sufficient ampacity and an available breaker space. Most homes on 100-amp service cannot support a Level 2 EV charger alongside existing loads without upgrading panel amperage first.