
The residential electrical installation process is a structured sequence of stages, from planning and permitting through rough-in wiring, inspections, and final testing, that produces a safe and code-compliant electrical system in any home. Every stage depends on the one before it. Skip a step or rush a phase, and you risk failed inspections, costly rework, or worse, a serious safety hazard. This article walks you through each phase of the residential wiring installation process, explains what inspectors look for, and tells you exactly what to do as a homeowner to keep your project on track and up to code.
What are the key stages of the residential electrical installation process?
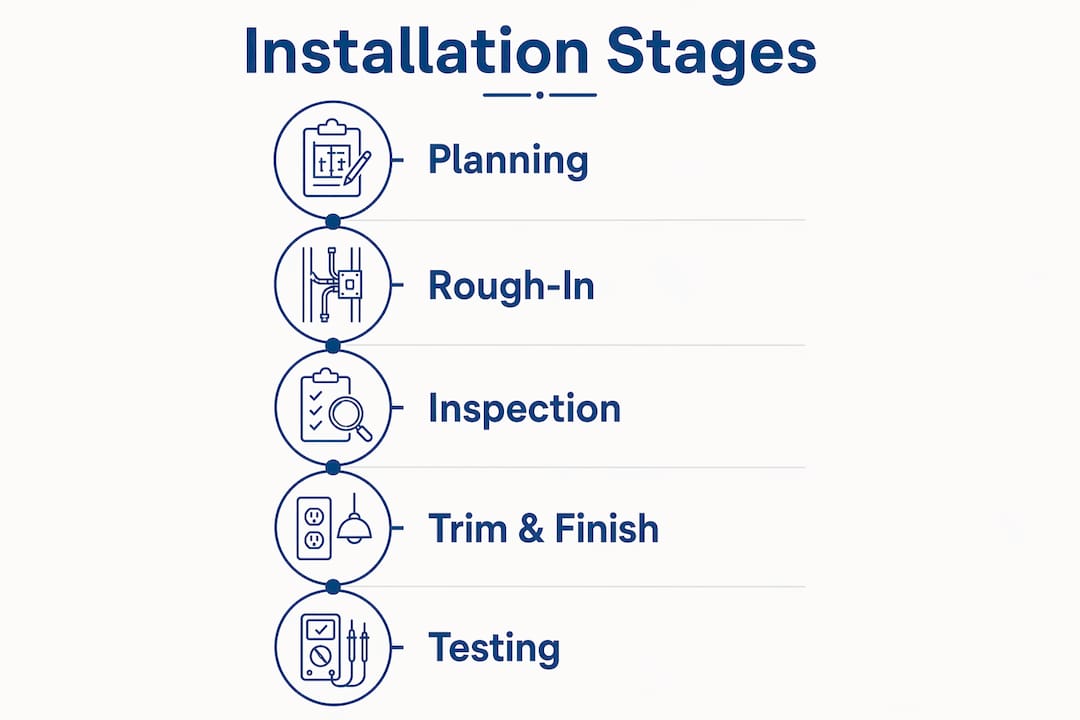
Residential electrical installation stages follow a fixed sequence: planning and design, rough-in wiring, rough-in inspection, trim and finish, and final inspection with testing. Each phase has a clear entry and exit point. You cannot legally move to the next stage until the current one passes inspection.
Stage 1: planning and design
The planning phase covers load calculations, panel sizing, and circuit layout. Your electrician determines how many circuits your home needs, what gauge wire each requires, and where the main panel will sit. This is also when permits get filed with your local Authority Having Jurisdiction, known as the AHJ. Incomplete permit submissions delay projects before a single wire gets pulled. Required documents typically include single-line diagrams, load calculations, equipment specifications, and site plans.
Pro Tip: Ask your electrician for a copy of the permit and approved plans before work starts. Keep them on site. Inspectors will ask for them.
Stage 2: rough-in wiring
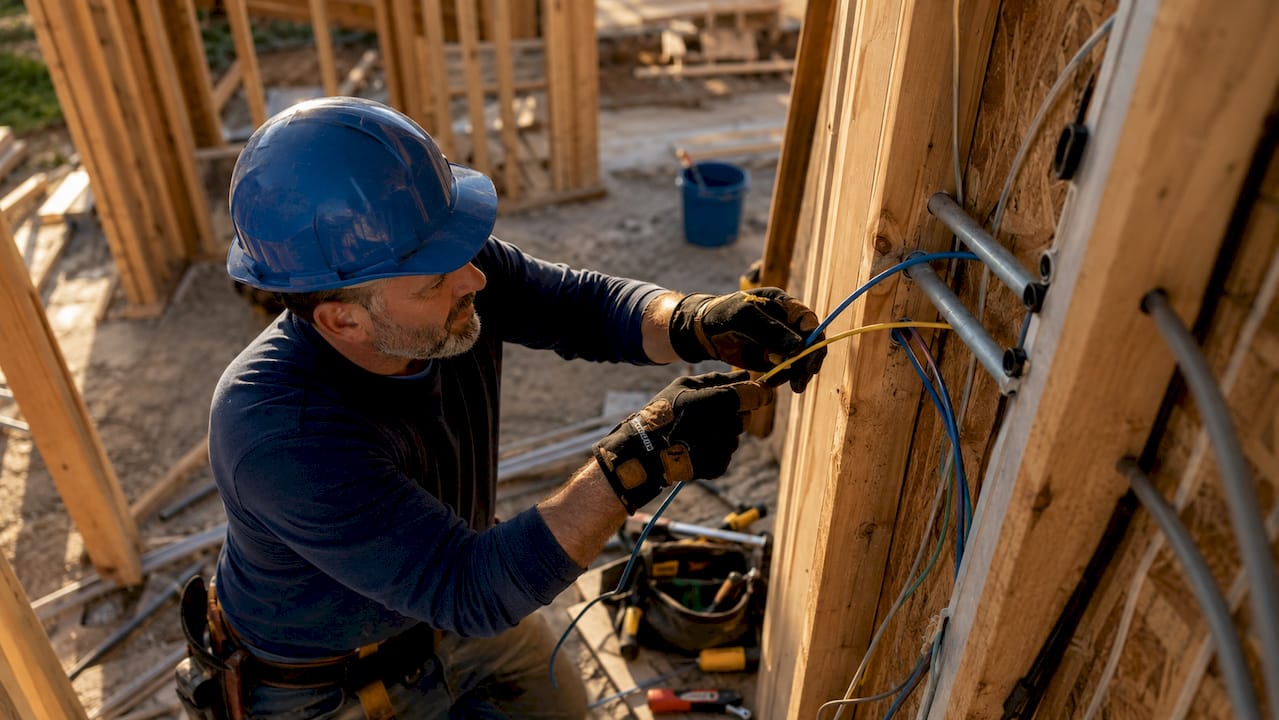
Rough-in is the phase where cables and conduit get installed inside walls, ceilings, and floors before any surface is closed up. Electricians mount electrical boxes, run wire through studs, and leave enough conductor length at each box for future connections. Nothing gets connected to devices or the panel yet. The goal is to get all the wiring in place while walls remain open and visible.
Stage 3: rough-in inspection
The rough-in inspection is the first major checkpoint. Covering electrical work before a successful rough-in inspection violates IRC 2018 Section R109.1.3 and can result in fines and mandatory wall reopening. The inspector visually checks wiring paths, box placement, cable support, and conductor sizing. Nothing gets concealed until this inspection passes.
Stage 4: trim and finish
Once the rough-in passes, drywall goes up and the finish phase begins. Electricians install outlets, switches, light fixtures, and cover plates. The panel gets wired with breakers connected to their circuits. This phase transforms a house full of loose wires into a functional electrical system.
Stage 5: final testing and commissioning
The final phase involves energizing circuits, testing every outlet and fixture, and labeling the panel directory. Panel directory accuracy and proper working clearances around the panel are two of the most commonly overlooked items at final inspection. A whole-house rewiring project typically spans 2–4 weeks from assessment through final inspection, not counting drywall repairs.
How do inspections work during residential electrical installation?
Inspections are the legal checkpoints that confirm your wiring meets the National Electrical Code, or NEC, and any local amendments. There are two critical gates: the rough-in inspection before walls close, and the final inspection after the system is energized. Missing either one causes costly delays and may require reopening finished walls.
What inspectors check at rough-in
Inspectors at the rough-in stage focus on several specific items:
- Box fill compliance under NEC Article 314: too many conductors in one box is a fire risk
- Conductor ampacity under NEC Article 310: wire gauge must match the breaker size
- AFCI and GFCI placement under NEC Articles 210.12 and 210.8: these devices must be in the right locations
- Cable support distances: staples and straps must secure cables at code-required intervals
- Grounding continuity: every metal box and device must connect to the grounding system
Rough-in inspection criteria include verifying wiring runs, cable supports, and receptacle protections. Inspectors count conductors, check staple spacing, and confirm box placement before signing off.
The first-pass failure rate for residential electrical inspections averages around 25%. Missing or non-functional GFCI protection is the single most common cause. That number means roughly one in four residential projects requires a re-inspection, which adds time and money to the job.
Pro Tip: Before the inspector arrives, walk through the job yourself. Verify every box is open and accessible, check that GFCI outlets are installed where required, and confirm cables are stapled within 12 inches of each box.
What inspectors check at final
The final inspection shifts focus from wiring to function. Inspectors test GFCI and AFCI devices, verify panel labeling and clearances under NEC 110.26, and confirm all fixtures work. A mislabeled panel directory or a panel installed too close to a wall can fail the final inspection even when all the wiring is perfect.
Homeowners can reduce rework risks by performing self-inspections before the official visit. Test every GFCI outlet with its test button, check that all boxes have cover plates, and make sure the panel directory matches the actual circuits.
What electrical codes govern residential wiring installation?
The NEC is the primary code governing residential wiring in the United States. Local jurisdictions adopt the NEC and often add amendments. The AHJ in your area determines which version of the NEC applies and what local rules override it. Checking with your local AHJ before starting any project is not optional. It is the only way to know exactly what your installation must meet.
The table below shows the key NEC articles that apply to most residential installations and what each one covers.
| NEC Article | What It Covers | Why It Matters to Homeowners |
|---|---|---|
| Article 210.8 | GFCI protection requirements | Kitchens, bathrooms, garages, and outdoor outlets must have GFCI protection |
| Article 210.12 | AFCI protection requirements | Bedrooms and living areas require arc-fault circuit interrupters |
| Article 310 | Conductor sizing and ampacity | Wire gauge must match the breaker to prevent overheating |
| Article 314 | Electrical box fill and installation | Boxes must be large enough for the number of conductors inside |
| Article 110.26 | Working clearances around panels | A clear 36-inch space in front of panels is required for safe access |
GFCI protection is required in kitchens, bathrooms, and damp locations under the NEC 2023 updates. AFCI protection covers dwelling areas including bedrooms and living rooms. These two device types together address the leading causes of residential electrical fires and electrocutions.
Non-compliance carries real consequences. Insurance companies can deny claims on homes with unpermitted or non-code electrical work. Resale becomes complicated when a home inspection reveals unpermitted wiring. In serious cases, local authorities can order a homeowner to remove and redo work at their own expense.
How should homeowners prepare for and manage the installation process?
Managing a residential electrical project well comes down to three things: hiring the right people, getting permits early, and communicating clearly throughout the job.
- Verify your electrician’s license. Every state requires electricians to hold a valid license. Ask for the license number and check it with your state licensing board before signing a contract.
- Pull permits before work starts. The permitting process is the foundation of a compliant project. Permits create a legal record that the work was inspected and approved. Skipping permits to save time almost always costs more in the long run.
- Schedule inspections proactively. Do not wait until the last minute to call the AHJ. In many areas, inspection slots book out several days in advance. Build inspection scheduling into your project timeline from the start.
- Never conceal work before inspection. Closing walls before the rough-in inspection passes is the single most expensive mistake on residential electrical projects. Failures at rough-in can require reopening walls, redoing cable runs, and paying for a second inspection.
- Keep all documents on site. Permits, approved plans, and inspection records should stay at the job site until the project is complete and the certificate of occupancy is issued.
Pro Tip: Ask your electrician to walk you through the panel layout before the final inspection. Understanding which breaker controls which circuit helps you catch labeling errors before the inspector does.
For a detailed breakdown of what each phase involves, the residential construction electrical phases checklist from Gregbeverlyservices covers common failure points and practical tips for passing inspections.
Key takeaways
A safe residential electrical installation depends on completing every stage in sequence, pulling permits before work begins, and passing both the rough-in and final inspections without skipping steps.
| Point | Details |
|---|---|
| Follow the five-stage sequence | Planning, rough-in, rough-in inspection, trim/finish, and final testing must happen in order. |
| Never conceal wiring before inspection | Covering work before rough-in inspection passes violates IRC 2018 and forces costly rework. |
| Know your NEC requirements | Articles 210.8, 210.12, 310, and 314 govern the most common residential wiring decisions. |
| First-pass failure rate is 25% | Missing GFCI protection is the top cause; a self-inspection before the official visit reduces risk. |
| Permits protect your investment | Unpermitted work can void insurance coverage and complicate home resale. |
What i’ve learned after watching homeowners navigate electrical projects
Most homeowners underestimate how much the inspection process shapes the entire project timeline. The two inspection gates, rough-in and final, are not bureaucratic formalities. They are the moments when an independent set of eyes confirms that your home’s wiring will not hurt anyone. I have seen projects where a contractor rushed to close walls before the rough-in inspection passed. The result was a complete tearout of newly installed drywall, a re-inspection fee, and a three-week delay. The cost savings the contractor was chasing evaporated immediately.
The other thing homeowners consistently misunderstand is the difference between the NEC and local code. The NEC sets the national baseline, but your local AHJ may require stricter rules. A homeowner in Myrtle Beach or Conway, South Carolina, faces different local amendments than someone in Charlotte. Assuming the NEC is the final word without checking with your local AHJ is a mistake that shows up at inspection.
My honest advice: treat the permit and inspection process as your best protection, not as an obstacle. A licensed electrician who knows your local AHJ’s expectations is worth every dollar. The types of residential electrical permits vary by project scope, and understanding which ones apply to your job before you start saves real time and money.
— SEO
Let Gregbeverlyservices handle your residential electrical installation
Gregbeverlyservices has served the Grand Strand area for over 40 years, managing residential electrical projects from initial permit filing through final inspection. The team knows South Carolina’s local AHJ requirements, handles all permit documentation, and coordinates inspection scheduling so your project stays on track.

Whether you are building a new home, remodeling, or upgrading an older system, Gregbeverlyservices delivers code-compliant work backed by transparent communication and skilled craftsmanship. Explore the full range of residential electrical services or contact the team directly to discuss your project. For new construction projects specifically, the residential construction services page outlines exactly how Gregbeverlyservices manages each phase from planning through completion.
FAQ
What is the first step in the residential electrical installation process?
The first step is planning and design, which includes load calculations, circuit layout, panel sizing, and permit filing with the local AHJ. No wiring work begins until permits are approved.
How long does a residential electrical installation take?
A whole-house rewiring project typically takes 2–4 weeks from assessment through final inspection, not including drywall repairs. New construction timelines vary based on home size and inspection scheduling.
What causes most residential electrical inspection failures?
Missing or non-functional GFCI protection is the leading cause of first-pass inspection failures, which occur in roughly 25% of residential projects. Box fill violations and improper cable support are also common issues.
Do homeowners need a permit for electrical work?
Yes. Any new wiring, panel upgrade, or significant electrical modification requires a permit filed with the local AHJ. Unpermitted work can void homeowner’s insurance and create problems at resale.
What is the difference between GFCI and AFCI protection?
GFCI devices protect against electric shock in wet locations like kitchens and bathrooms under NEC Article 210.8. AFCI devices protect against arc faults that can cause fires in living areas and bedrooms under NEC Article 210.12.